You’ll need to format an SD card if the card has been used in another brand camera or is outdated. This will cause the camera to take photos, but not successfully save the photo to the card which in turn, will not send the pic to HuntControl. Below are the easy steps showing how to correctly format an SD card using the SmartCam or Mini.

Mini Cam

Step 1: Install the SD Card & Turn the camera to Setup

Insert the SD card you want to format (Must be 8-32GB). Turn the Mini to SETUP then let the camera boot up. You do not need to wait for the camera to find a signal.

Step 2: Tap Menu

Once the camera turns on, tap the menu button. Then tap about.

Step 3: Scroll Down to SD Format

Scroll down to SD Format and tap the OK button. Tap the OK button again to confirm the format. A message saying “execution completed” will appear showing the format has taken place. You have successfully formatted the SD card!
*Note: Formatting an SD card will erase every file on the card so be sure to save any files that you want before formatting.

SmartCam

Step 1: Turn the SmartCam to SETUP

Insert the SD card you want to format. Turn the SmartCam to SETUP then let the SmartCam boot up. You do not need to wait for the camera to find a signal or GPS location.

Step 2: Tap the up arrow

Once the camera boots up, tap the up arrow. You should either see “No File” or the latest pic the camera has taken.

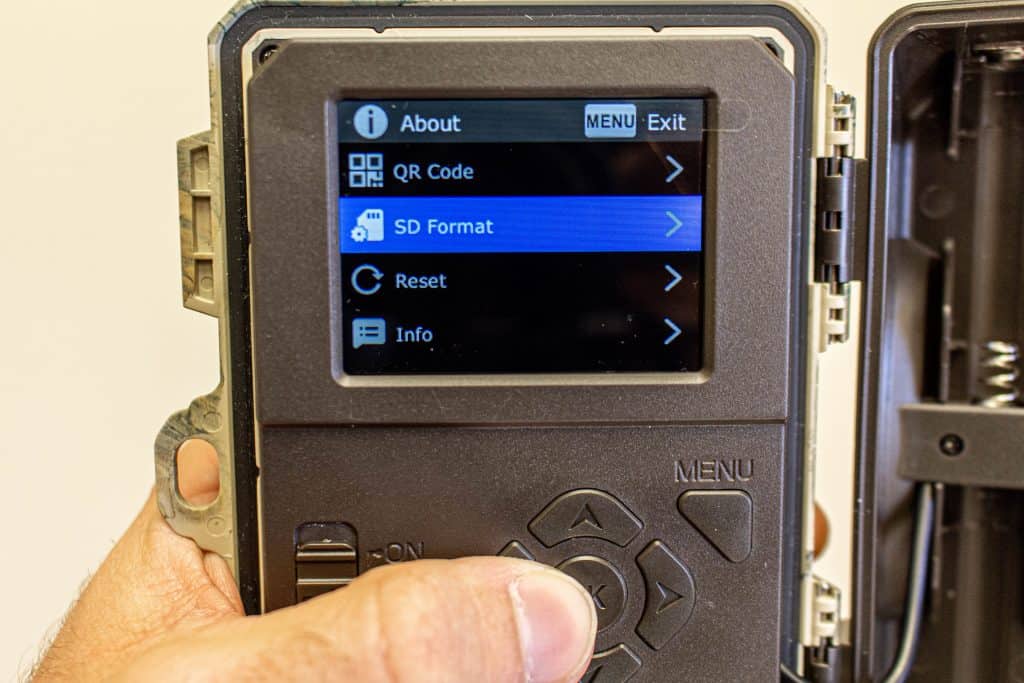
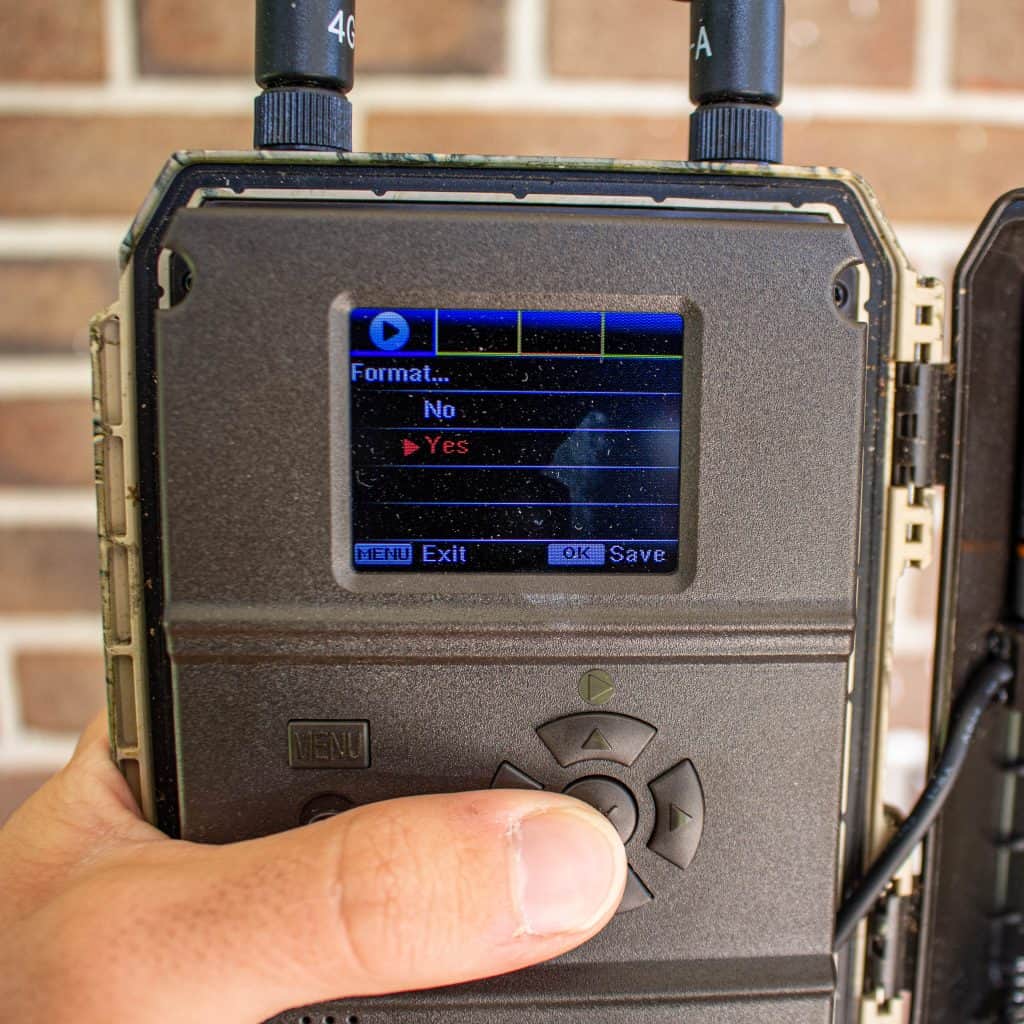
Step 3: Tap MENU, Tap Format…, Tap YES, Tap YES

Tap MENU, then scroll down to “Format..” click the OK button. Next, select “YES” then confirm the format by selecting “YES” again.
*Note: Formatting an SD card will erase every file on the card so be sure to save any files that you want before formatting.

Step 4: The SD card is now formatted

The screen will say please wait while the camera formats the SD card. Once the card is formatted you should be ready to start taking pictures with your SmartCam!